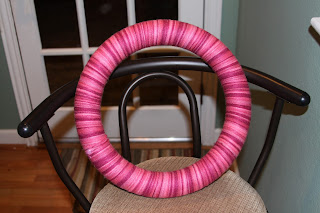
A yarn wreath seemed like a fairly easy and inexpensive way to achieve this. I started with a styrofoam wreath (Michael's, $4.99), a ball of pink variegated yarn (JoAnn's, $2.99), some Aleene's Tacky Glue (JoAnn's, $1), and some scissors.
I glued the beginning of the yarn to one side of the wreath. I wanted a clean look, so I wound the yarn tightly and in perfect straight lines. Here is the beginning:
This is a close up of how I was winding the yarn:
I went once around the wreath and it took about an hour, maybe an hour and fifteen minutes. Every once in a while, I would push all the yarn together so that it was as tight as possible. Also, pro tip: Sometimes, you should turn the wreath over and make sure the other side isn't all messed up. I ASSUME that could happen to SOME PEOPLE if they aren't paying attention. It definitely didn't happen to me, no siree.
This is what it looked like when I was done winding the yarn. I really like how the variegated yarn made it look.
 |
| Excuse the poor picture - it was getting late. |
To jazz up the wreath a little, I got some felt pieces (I used just one 9x12 white piece) to make rosettes. I traced circles of varying sizes on the felt first, because I failed cutting in Kindergarten and I was definitely NOT going to freehand this. I used a Christmas mug, the top of a CD holder, and an old Rodeo giveaway item for different size circles.
 |
| What, you don't have a headless monkey riding a dog at YOUR house? |
Once you cut the circles, you then cut the circle into a spiral. Like so:
 |
| Cutting the spiral |
 |
| The spiral and the piece left over. |
Then I took one piece of the spiral and rolled it around itself until it formed a rosette. Glue the last bit to itself, and then glue the whole thing onto the little piece left over.
 |
| You know what's hard? Photographing a white flower. |
I then glued the rosettes to the wreath, braided some yarn, and hung the wreath on the door. I might add some more flowers later, but for now I like the clean, simple look of it.
In the end, I think it turned out pretty. Craft #1 a success!


No comments:
Post a Comment